ActionScript3 - Tutorial 1 - Pacman
DESCRIPTION:
This tutorial teaches you how to make a VERY simple Pacman game in Adobe Flash CS4 Professional using ActionScript3
For a tutorial on how to use Adobe Flash CS4 Professional: Link not yet added but this image should help in the mean time Picture1
Here's an example of what you'll be making in this tutorial: Pacman
1.) Open the Properties Panel and click on the box next to the tag "Stage:" - select a black colour from the pop-up menu

2.) On the Timeline double-click on where it says "Layer 1" and rename the layer "Pacman"
3.) Click Ctrl+F8 (or click Insert>NewSymbol on the Menu Bar)
4.) Make the Type a Movie Clip and name it "Pacman" (Note: This is capital sensitive!)
5.) Now hit "O" (or click and hold the Rectangle-Tool from the Tools Panel select the Oval-Tool)
6.) On the Properties Panel click the strokeColor Tool and choose no outline

7.) Select a Pacman-yellow colour from the fillColor Tool in the Properties Panel
8.) On the stage draw a (quite large) circle starting from the
cross-head point (It's a good idea to line-up the circle with the
Crosshead now... Quickly skip to AS3-Step13-XX for more info!)

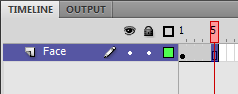
9.) On the Timeline Panel rename Layer1 as Face
10.) Click on the 5th frame on this layer and hit "F5"
11.) On the Timeline Panel insert a new layer (The tool to the left of the folder&bin icons)
12.) Rename the new Layer as "Mouth"
13.) Click on the first frame of this layer and hit "N" (or select the line-tool from the Tools Panel) to draw a TRIANGLE creating a mouth, then fill it in using the Fill-Tool.

14.) Now hit "V" (Or select the selection tool from the Tools Panel) to select the tri-angle edges and delete them in turn.
15.) Hit "F6" on each of the frames on the Mouth-Layer to create KeyFrames (Frames you can change without changing the rest)

16.) Now hit "Q" (Or select the free transformation tool from the Tools Panel) and go through the Mouth-Layer frames changing the mouth in each to make it appear like it's opening and closing.
17.) Return to Scene 1 (By click "Scene 1" just below the Timeline Panel
18.) Drag the Pacman-Movieclip from the Library Panel onto the stage
19.) Test you movie (Ctrl+Enter) Pacman's mouth should now move.
20.) On the stage use the Free Transformation Tool (Hit "Q") to resize the Pacman and place him on the left of the stage
21.) On the Timeline Panel Right-Click on Frame1 of the Pacman layer and select "Create Motion Tween"
22.) Go to frame30 and hit "F6"
23.) On frame30 drag the pacman to the right of the stage
24.) Test your movie (Ctrl+Enter) and your pacman should now move at a steady pace to the other side of the stage
25.) Save your project (Ctrl+S)
Right! Now that's shiz is all done it's time to do some ActionScript.
1.) Create a new layer called "Actions" and delete the Pacman layer (This wont loose the movie clip, don't worry)
2.) Right-click on "Pacman" on the Library Panel and go to "Properties..."
3.) Click "Advanced" and then click tick "Export for ActionScript" under the Linkage heading
(Note: If a warning comes up select "Dont Show Me This Again" and click OK)
4.) Create a KeyFrame ("F6") at Frames 2&3 on the Actions Layer
5.) Hit "F9" (To open the Actions Panel and then write the following code into the Frames:
Frame 1:
Frame 2:
Frame 3:
6.) Test the movie - a pacman should appear and move slowly across the screen
7.) Now go to the Frame1 ActionScript and add these lines to the coding you already have:
8.) Now test the movie, make sure it's still all working...
9.) Add the following code under the rest of the code in Frame1:
10.) Chang the code in Frame2 to the following:
11.) Now you can change all the values easily... now it's time for the more complex stuff.
12.) Add the following script under the rest of the code in Frame1
13.) Test your movie - you should now be able to move you pacman around using the Up/Down/Left/Right keyboard keys!
XX.) If you want the Pacman to stop jumping around with each rotation follow these instrutcions:
X1.) Go into the Pacman Movie-clip by right-clicking it in the Library Panel and going to "Edit..."
X2.) Move the Face-Layer circle so the little circle is inline with the
cross-head on the stage then move all the mouth-pictures to be in place
again.
X3.) Go back to Scene1
14.) In Scene1 create a new Layer called "Apple"
15.) Create a new MovieClip (Ctrl+F8) called Apple and draw a simple apple around the cross head (A green circle will do)
16.) Now click on Scene1 and go to Frame1 of the Apple layer and drag the Apple (From the Library Panel onto the stage
17.) Use the Free Transformation Tool ("Q") to resize the apple, make it pretty small.
18.) Click on it and change "" to "apple1" (case sensitive!) in the Properties Panel
19.) Create a KeyFrame ("F6") at Frame4
20.) Type "Winner!" or "You Win!" or something similar onto this frame and add this code to the Actions ("F9")
21.) On frame2 of the Actions Layer add the following ActionScript:
22.) And you finished. Test your movie!
- Tutorial was written by Alex (Shenk.)
Any errors in this tutorial should be emailed to  or reported on the ShoutBox.